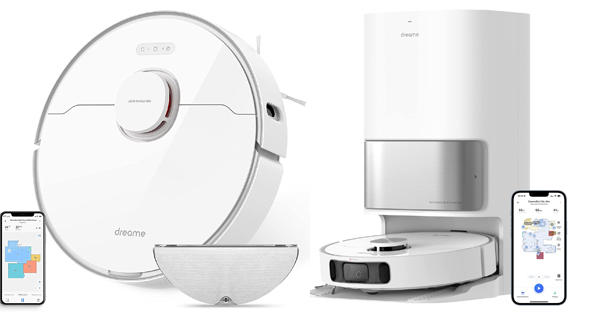
This manual applies to the Dreame L10 PRO and L10s Ultra Robot Vacuum.
L10 Robot Vacuum Preparations Before Use
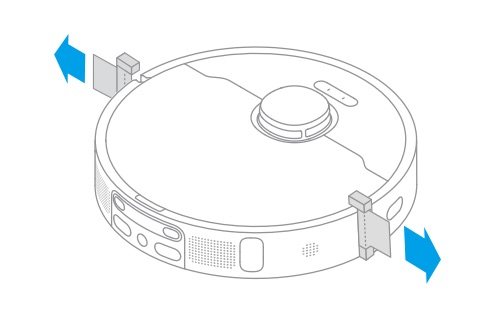
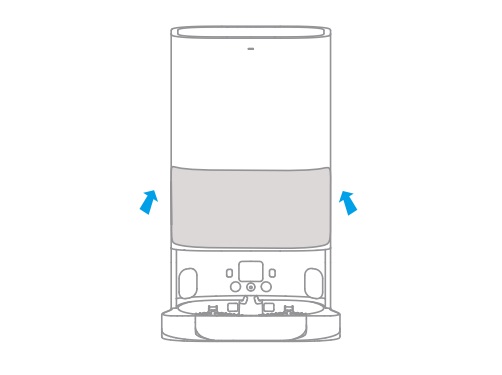
1. Remove the protective strips
2. Install the Side Brush and the Mop Assembly
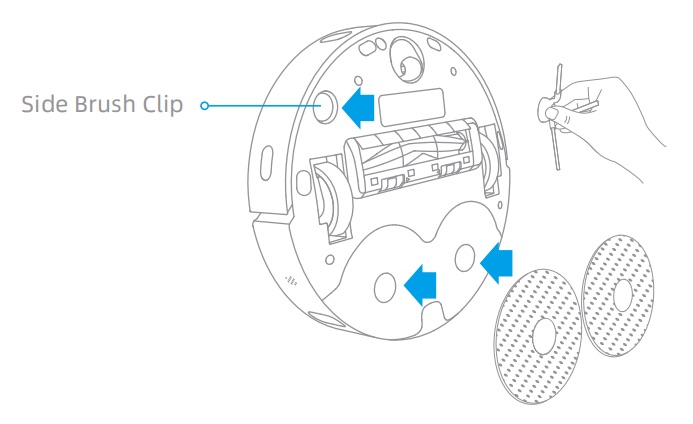
Note: Install the side brush until it clicks into place
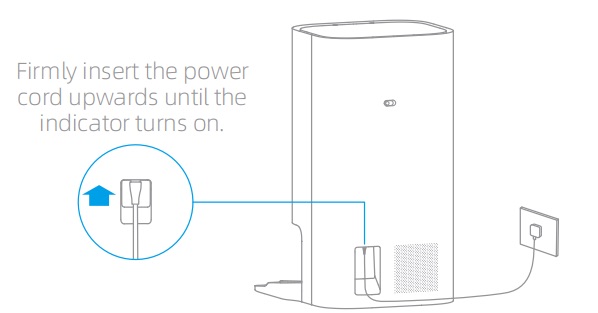
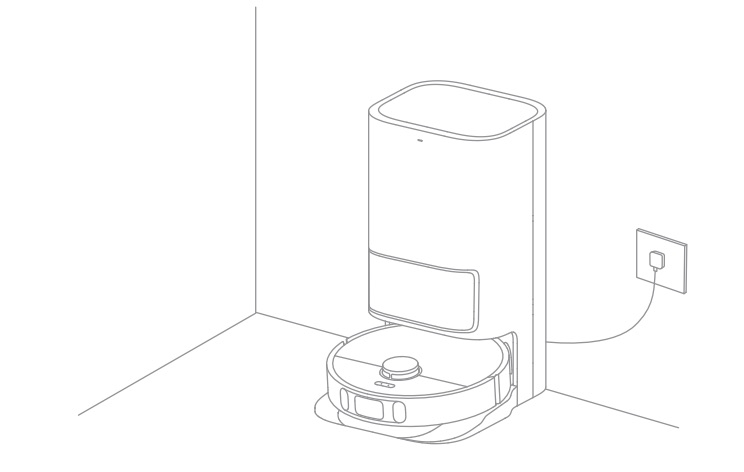
3. Connect to An Electrical Outlet
Place the base station in a location that is as open as possible with a good Wi-Fi signal. Insert the power cord into the base station and plug it into the socket.
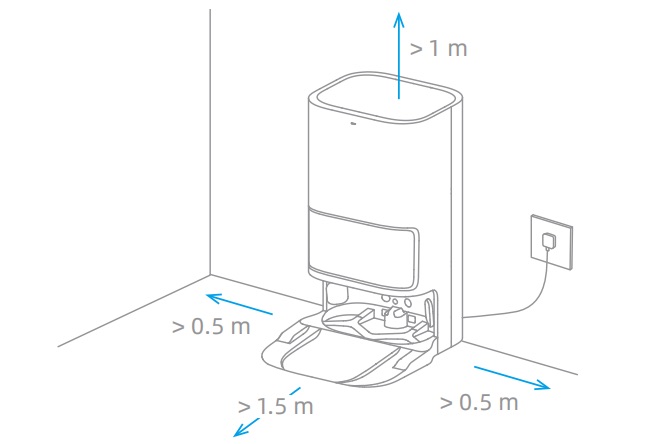
4. Place the Base Station
Remove any objects that are closer than 1.5 m from the front, 1 m from the top, and 0.5 m from either side of the base station.
Note:
- Make sure that no objects might block the signaling area.
- To prevent water stains from wetting wood floors or carpets, placing the base station on tile floors or marble floors is recommended.
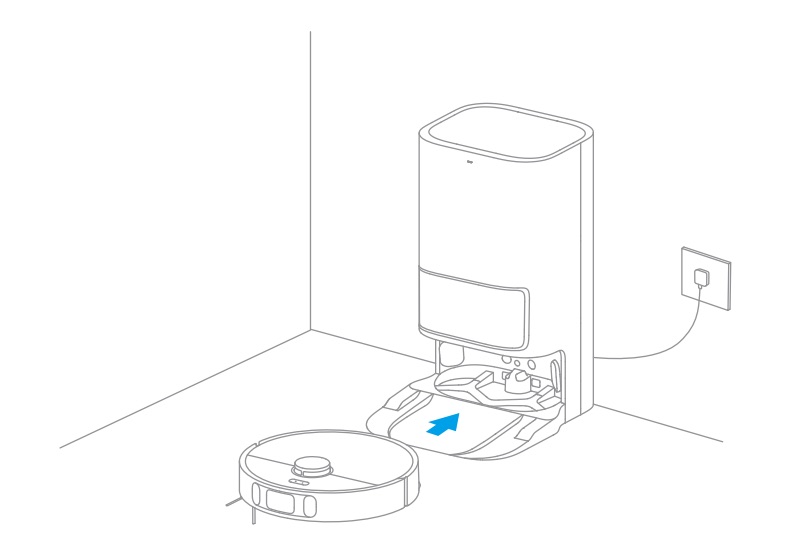
5. Place the Robot
Press and hold the ![]() button on the robot for 3 seconds to turn it on. Place the robot onto the base station with the mop assembly facing toward the washboard. Then you will hear a voice notification when the robot successfully connects to the base station and starts charging. After the robot is fully charged, the status indicators on the robot and the base station will remain lit for 10 minutes and will then dim.
button on the robot for 3 seconds to turn it on. Place the robot onto the base station with the mop assembly facing toward the washboard. Then you will hear a voice notification when the robot successfully connects to the base station and starts charging. After the robot is fully charged, the status indicators on the robot and the base station will remain lit for 10 minutes and will then dim.
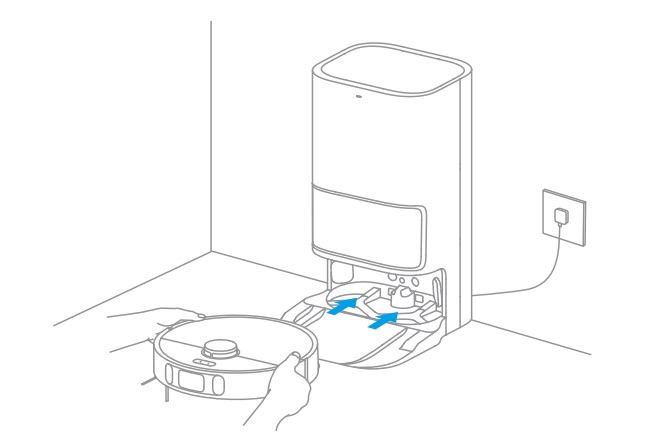
Note: It is recommended to fully charge the robot before its first use. When the robot cannot be turned on after the battery is depleted, manually connect the robot with the station to charge it.
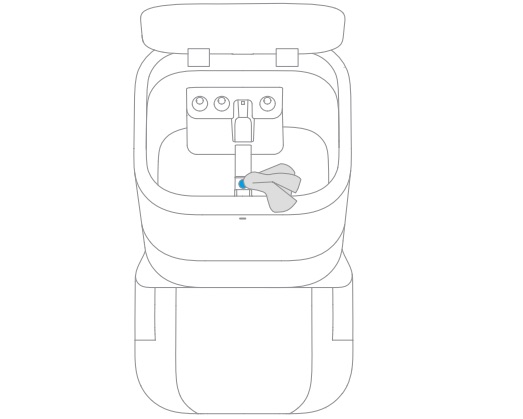
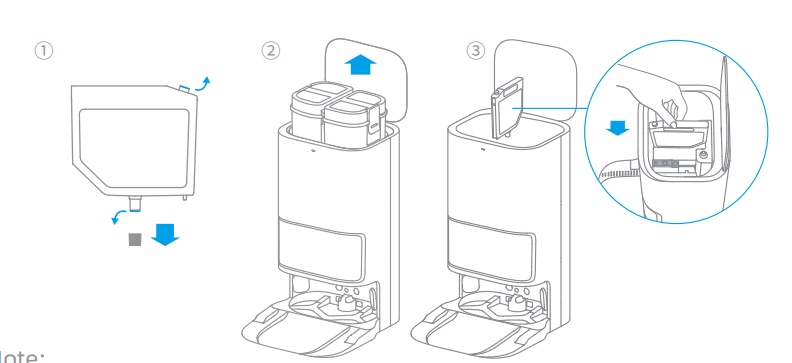
6. Install the Cleaner Bottle
Remove the cap of the cleaner bottle, and tear off the seals on the upper and bottom of the bottle. Open the upper cover of the base station and take out the clean water tank and the used water tank. Install the cleaner bottle along the slot into place. The cleaner will be added automatically while working.
Note:
- Remove the soft rubber plug in the cleaner adding inlet before first use.
- Do not add any liquid other than the officially-approved cleaner to help prevent base station malfunction.
7. Add Water to the Clean Water Tank
Fill the clean water tank with clean water up to the maximum water level mark, and then install the clean water tank and the used water tank in place.

Note: Do not add hot water to the water tank, as this may cause the tank to become deformed.
How to connect Dreame L10 to Phone?
This product works with the Dreamehome or Mi Home/Xiaomi Home app,
which can be used to control your Robot Vacuum.
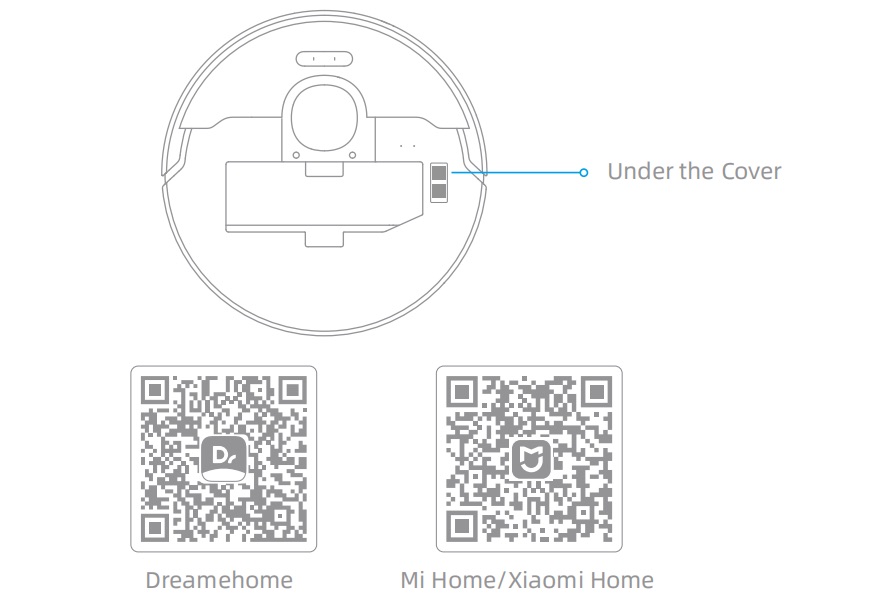
1. Download the Dreamehome or Mi Home/Xiaomi Home App
Scan the QR code on the robot, or search“Dreamehome” or “Mi Home”/ “Xiaomi Home” in the app store to download and install the app based on your needs.
Note:
- Only 2.4 GHz Wi-Fi networks are supported.
- Due to upgrades in the app software, the actual operations may be different from the statements in this manual. Please follow the instructions based on the current app version.
2. Add Device L10 Robot Vacuum
Dreamehome APP: Open the Dreamehome app, enter the “Add Device” page, and then select “DreameBot L10s Ultra”. Please follow the prompts to finish the Wi-Fi connection.
Mi Home/Xiaomi Home APP: Open the Mi Home/Xiaomi Home app, tap ” ![]() ” in the upper right, and scan the QR code above again to add “DreameBot L10s Ultra”. Please follow the prompts to finish the Wi-Fi connection.
” in the upper right, and scan the QR code above again to add “DreameBot L10s Ultra”. Please follow the prompts to finish the Wi-Fi connection.
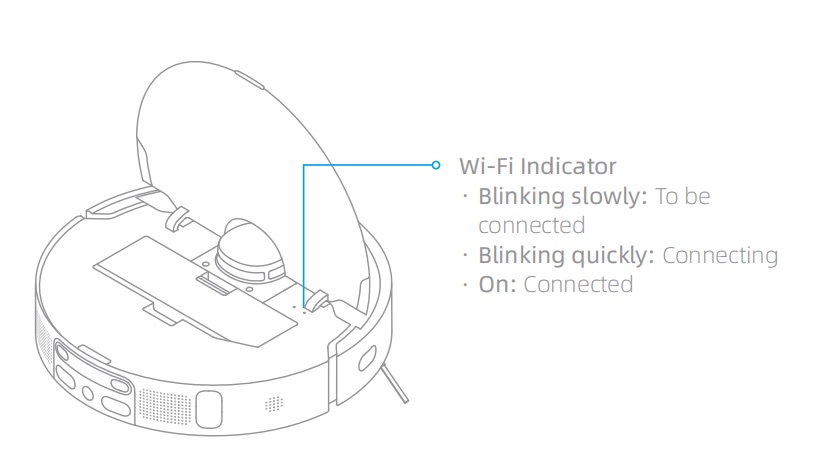
*Once the Wi-Fi indicator is blinking slowly, the Wi-Fi has been reset.
Note: If you want to reset Wi-Fi, follow step 1 and 2. Open the Dreamehome App or Mi Home/Xiaomi Home App, enter the “Add Device” page, then follow the prompts to finish the Wi-Fi connection.
How To Use Dreame L10 Robot Vacuum?
Fast Mapping
After configuring the network for the first time, follow the instructions on the app to quickly create a map, and the robot will start mapping without cleaning. The mapping process will be completed when the robot returns to the station, and the map will be saved automatically
Turn On/Of
Press and hold the  button for 3 seconds to turn on the robot. The power indicator should be illuminated. Place the robot onto the base, the robot should turn on automatically and begin charging. To turn off the robot, move the robot away from the base and press and hold the button for 3 seconds.
Pause/Sleep
When the robot is running, press any button to pause it.
If the robot is paused for more than 10 minutes, it automatically enters sleep mode. The power indicator and charging indicator will turn off. Press any button on the robot or base, or use the app to wake up the robot.
Note:
- The robot will turn off automatically if it is left in the sleep mode for more than 12 hours.
- If the robot is paused and placed onto the base station, the current cleaning process will end.
Do Not Disturb (DND) Mode
When the robot is set to the Do Not Disturb (DND) mode, the robot will be prevented from resuming cleaning and the power indicator goes out. The DND mode is disabled by default at the factory. You can use the app to enable the DND mode or modify the DND period. The DND period is 22:00-8:00 by default.
Note:
- The scheduled cleaning tasks will be performed on time during the DND period.
- The robot will resume cleanup where it left off after the DND period expires.
Spot Cleaning
When the robot is on standby, press briefly the button ![]() to enable the spot cleaning mode. In this mode, the robot cleans a square-shaped area of 1.5 × 1.5 meters around it and returns to its starting point once the spot cleaning is completed.
to enable the spot cleaning mode. In this mode, the robot cleans a square-shaped area of 1.5 × 1.5 meters around it and returns to its starting point once the spot cleaning is completed.
Robot Restarting
If the robot stops responding or cannot be turned off, press and hold the button for 10 seconds to forcefully turn it off. Then, press and hold the button for 3 seconds to turn the robot on.
Sweeping & Mopping
Note: When using the mop assembly for the first time, the robot performs the sweeping and mopping task by default.
1. Start sweeping and mopping
Press the button ![]() on the base station or
on the base station or ![]() on the robot, or use the app to make the robot start from the base station. Then the robot will plan the optimal cleaning route and perform the cleaning task based on the created map.
on the robot, or use the app to make the robot start from the base station. Then the robot will plan the optimal cleaning route and perform the cleaning task based on the created map.
Note:
- The mop pads will be cleaned before the robot starts mopping, please wait with patience.
- Do not move the base station, the clean water tank, the used water tank, or the washboard during its working.
2. Return to clean mop pads midway
During mopping, the robot will automatically return to the base station to wash mop pads based on the mop pad cleaning frequency specified on the app. Then the base station will automatically refill the water tank of the robot, and the robot will resume the cleanup after water refilling.
Note: If the robot returns to the base station to clean mop pads midway, the base station will not automatically empty the dust bin.
3. Clean and dry mop pads after dust emptying
After the robot finishes a cleaning task and returns to the base station to charge, the base station will automatically start emptying the dust bin, and then clean and dry the mop pads.
Note:
- When the robot returns midway to the base station to clean mop pads, the base station will not automatically empty the dust bin.
- If the auto-empty function is turned off in the app, the base station will not automatically empty the dust bin.
- The base station willempty the dust bin according to the frequency set in the app.
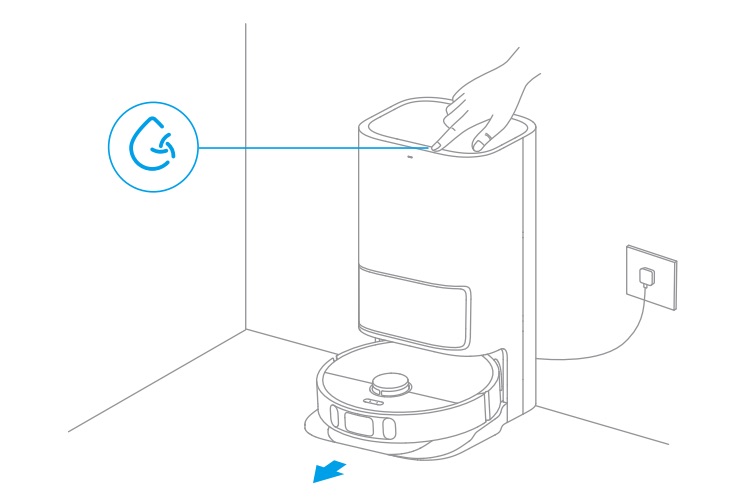
4. Clean the used water tank
After the robot has completed the task, please clean the used water tank to avoid any odor.
Sweeping
To use only the sweeping function, select “Sweeping” on the app, or remove the mop assembly from the robot and the robot will automatically switch to the sweeping mode.

Make sure that the base station is connected to power and the robot is connected with the base station. Press the button ![]() on the base station or the button
on the base station or the button ![]() on the robot, or use the app to send the robot to clean all areas from the base station.
on the robot, or use the app to send the robot to clean all areas from the base station.
Note:
To ensure the robot can easily return to the base station after cleaning, it is recommended to make the robot start from the base station and avoid moving the base station during cleaning.
Dreame L10 How to Routine Maintenance?
Dust Collection Bag
When the dust collection bag needs to be replaced, a notification will appear in the app.
1. Discard the dust collection bag.
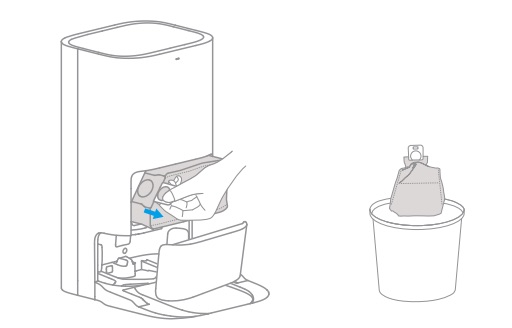
Note: Pulling upwards on the handle will seal the bag to prevent the dust and debris from accidentally falling out.
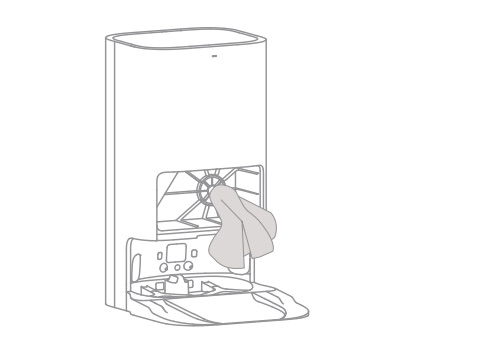
2. Remove the dust and debris from the filter with a dry cloth.
3. Install a new dust collection bag.
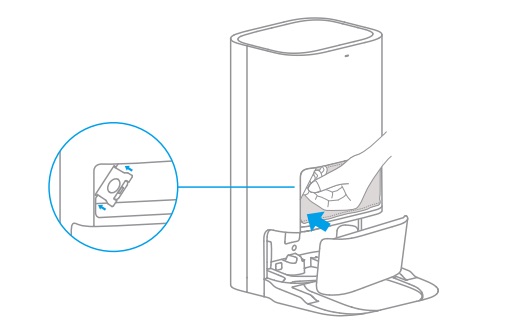
4. Close the cover of the dust cabinet.
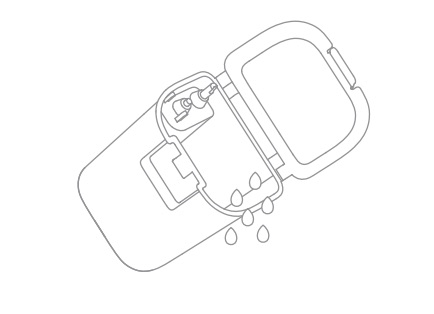
Used Water Tank
1. Remove the used water tank, open its cover and pour out the dirty water.
2. Rinse the used water tank with clean water, and use the provided cleaning brush to clean the inner wall of the used water tank.
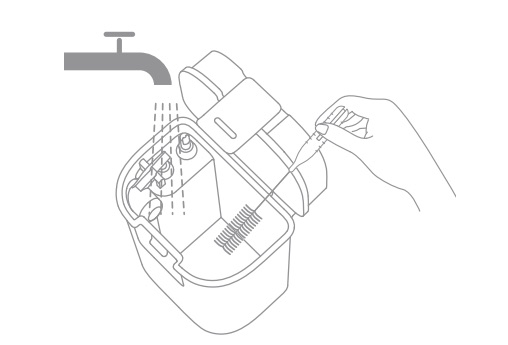
Note: The float ball in the used water tank is a movable part. Do not apply too much force when cleaning it to avoid damaging it.
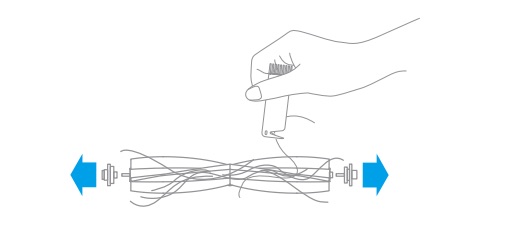
Main Brush
1. Press the brush guard clips inwards to remove the brush guard and lift the brush out of the robot.
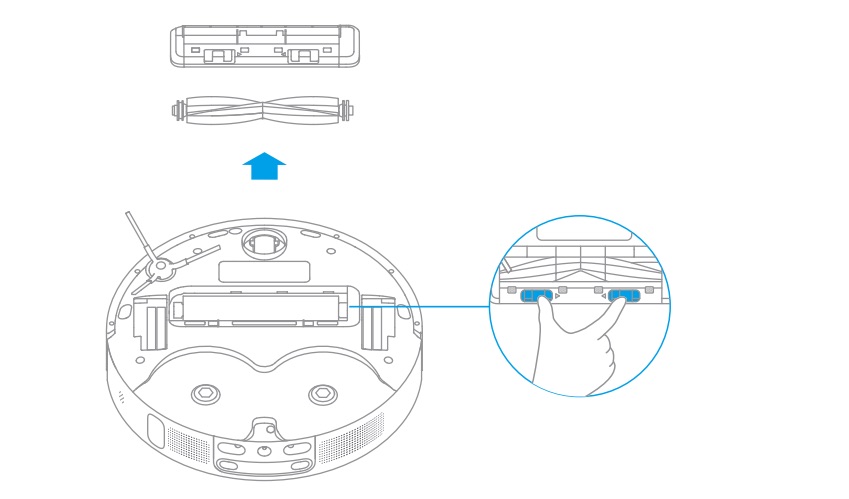
2. Pull out the brush covers as shown in the diagram. Use the provided cleaning tool to remove the hair tangled in the brush.
Side Brush
Remove and clean the side brush.
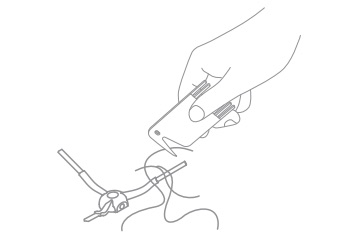
Universal Wheel
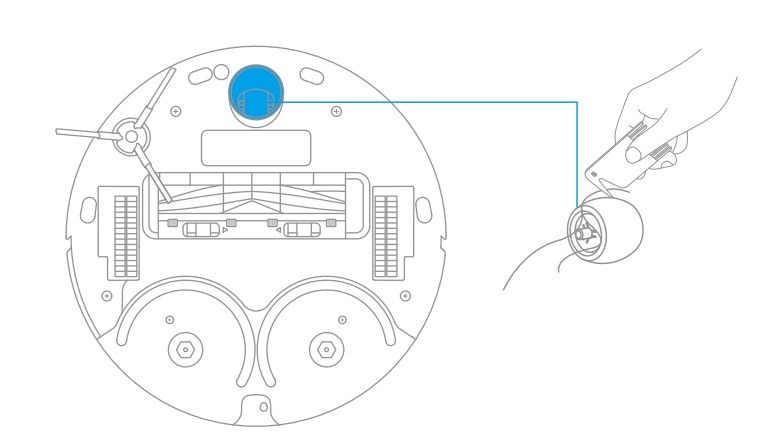
Note:
- Use a tool such as a small screwdriver to separate the axle and tire of the universal wheel. Do not use excessive force.
- Rinse the universal wheel under the running water and put it back after drying it completely
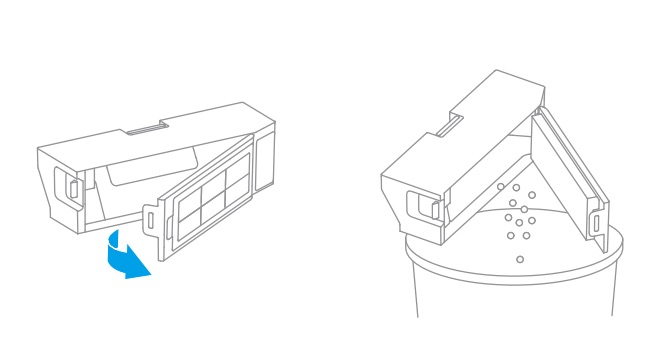
Dust Bin
1. Open the robot cover and press the bin clip to remove the dust bin.
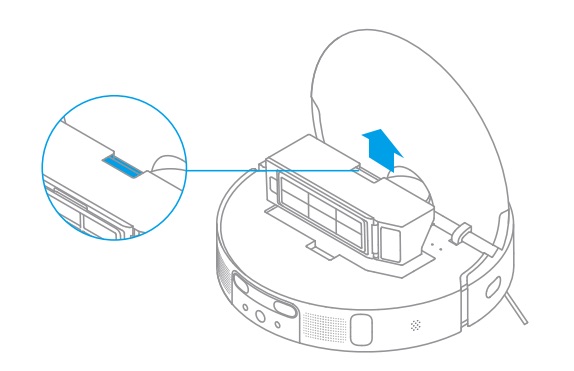
2. Open the bin cover and empty the bin as shown in the diagram.
Filter
1. Remove the filter and tap its basket gently
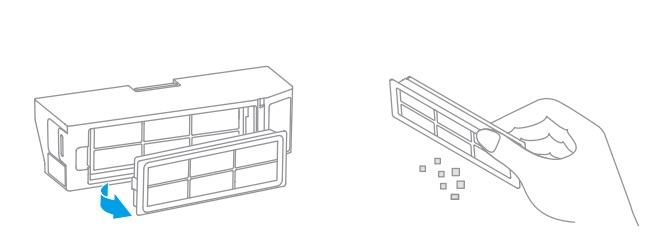
Note: Do not attempt to clean the filter with a brush, a finger or sharp objects to prevent damage.
2. Rinse the dust bin and filter with water and dry them completely before reinstalling.

Note:
- Rinse the dust bin and filter with clean water only. Do not use any detergent.
- Use the dust bin and filter only when they are completely dry.
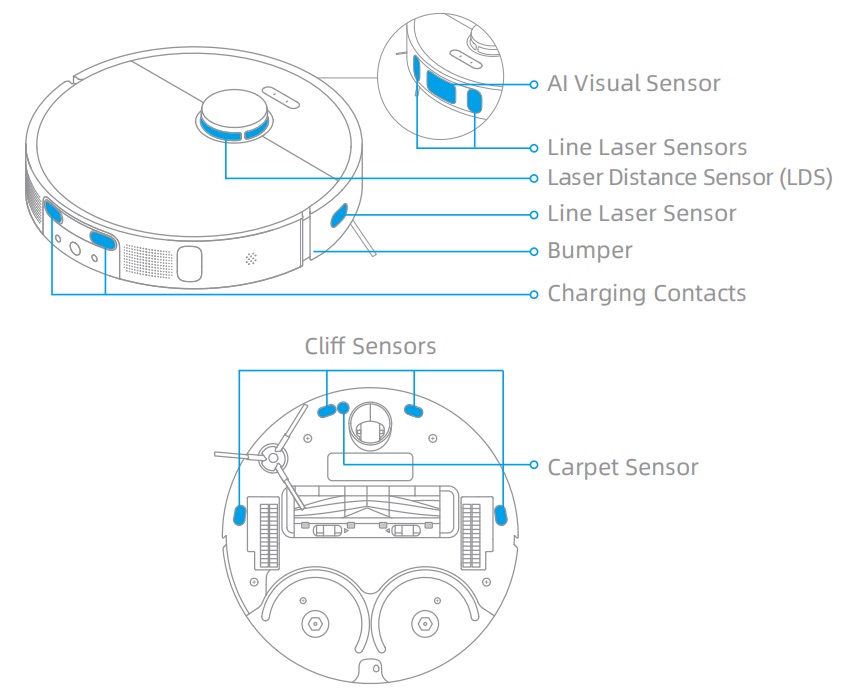
Robot Sensors and Charging Contacts
Wipe sensors and charging contacts of the robot by using a soft, dry cloth:
- The cliff sensors and the carpet sensor on the bottom of the robot
- Charging contacts at the back of the robot
- The edge sensor on the side of the robot
- LDS on the top of the robot
- The bumper, the AI visual sensor, and the line laser sensors on the front of the robot
Note: Wet cloth can damage sensitive elements within the robot and the base station. Please use dry cloth for cleaning.
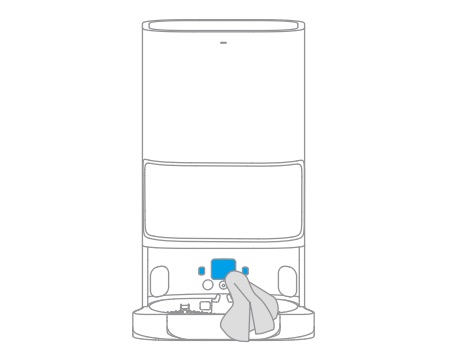
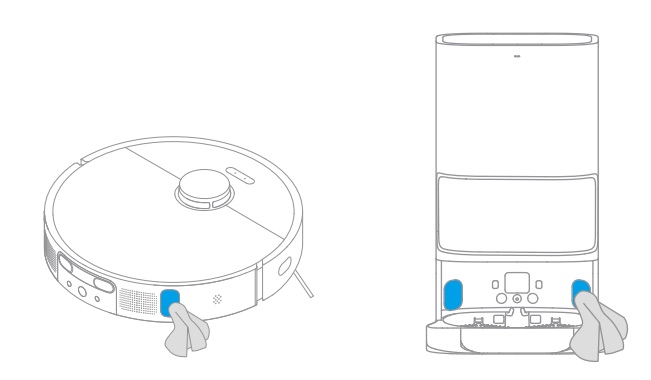
Charging Contacts
Clean the charging contacts and the signaling area of the base station with a soft, dry cloth.
Auto-empty Vents
Clean the auto-empty vents of the robot and the base station with a soft, dry cloth.
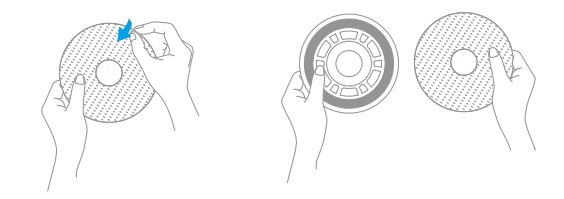
Mop Pad
Remove the mop pad from the mop pad holder to replace it.
Cleaner Adding Inlet
If the cleaner adding inlet is dirty, wipe it with a soft, dry cloth.