This manual applies to the Dreame D10 and D10 Plus Robot Vacuum.
D10 Robot Vacuum Preparations Before Use
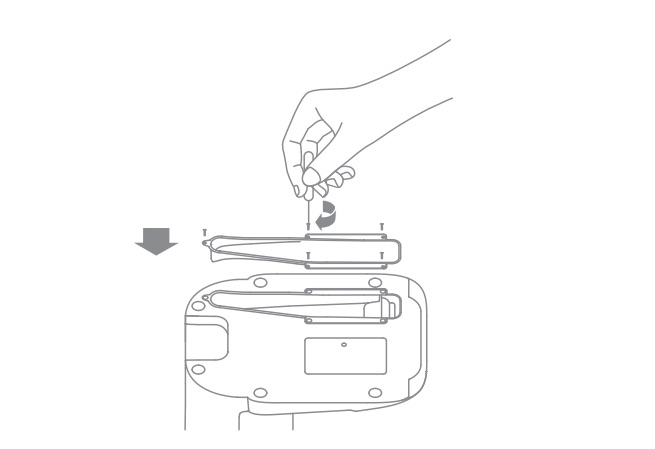
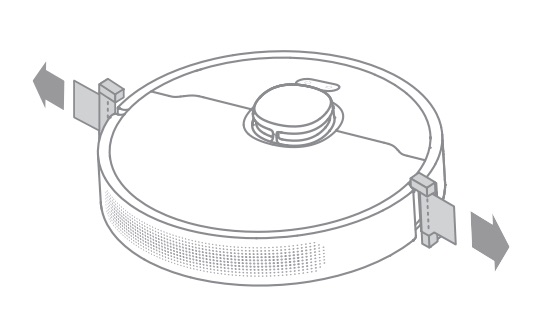
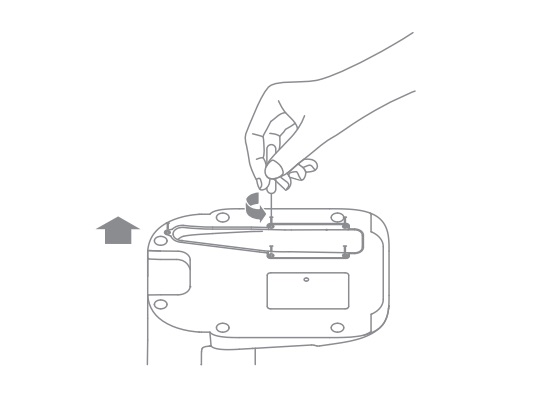
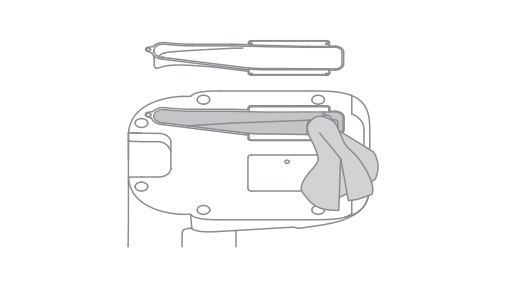
1. Remove the protective strips
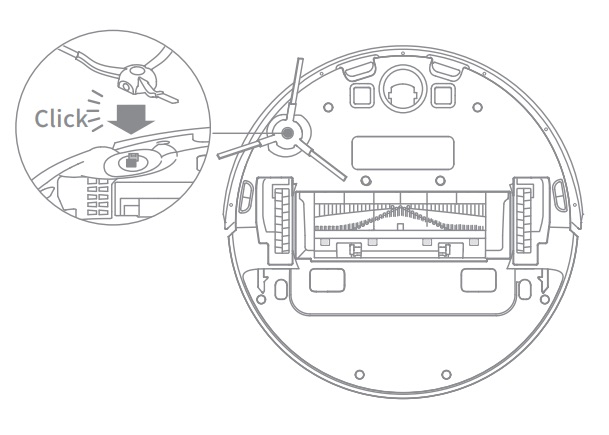
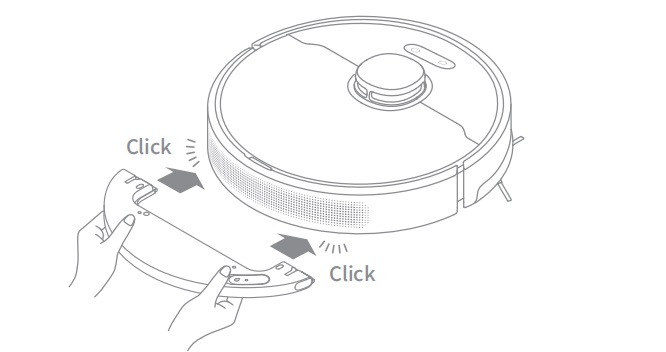
2. Install the side brush
Note: Install the side brush until it clicks into place.
3. Connect to a power outlet and start charging
Place the base on level ground against the wall and connect it to a power outlet. Place the robot onto the base to charge. The robot will turn on automatically and begin charging. It is recommended to fully charge your robot before first-time use.
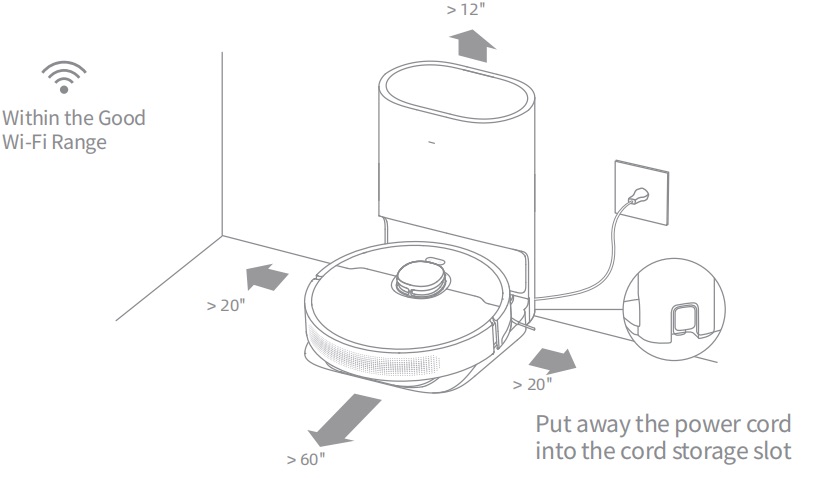
Note:
- Keep the immediate area 1.5 m in front of the base and 0.5 m to its both sides clear of objects.
- Make sure that no objects might block the signaling area.
About the D10 Auto-Empty Base
It is recommended that the robot set out from the base before cleaning. Do not move the base while the robot is cleaning. This ensures that the robot returns to base smoothly.
After the robot completes the cleaning task and automatically returns to the base, the base will start auto-empty. More settings can be operated on the APP.
How to connect Dreame D10 to Phone?
The Dreame W10 Robot Vacuum works with the Mi Home app, which can be used to control the appliance and make it interact with other smart devices.
Or use Dreame official app, Dreamehome.
D10 Robot Vacuum connects to Mi Home APP
Open the Mi Home app, and tap ” ![]() ” in the upper-right corner to go to the Add Device page. Then, tap “
” in the upper-right corner to go to the Add Device page. Then, tap “![]() ” in the upper-right corner, scan the QR code on the robot to add “Dreame Bot W10”, and then connect the device as prompted.
” in the upper-right corner, scan the QR code on the robot to add “Dreame Bot W10”, and then connect the device as prompted.
D10 Robot Vacuum connects to Dreamehome APP
Open the Dreamehome APP and click on the “+” in the upper right corner to enter the “Add Device” page. Then select Dreame W10 and follow the instructions to connect to Robot Vacuum.
Note: If the robot cannot connect to your phone, Reset the Wi-Fi network and try again.
How To Reset D10 Robot Vacuum Wifi?
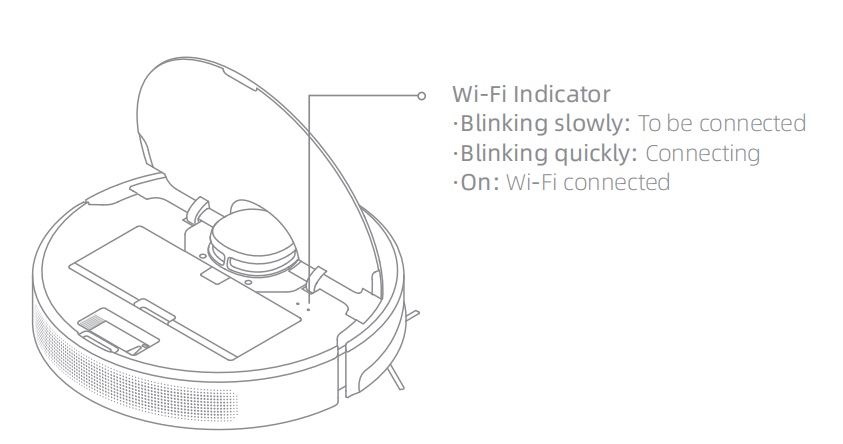
Simultaneously press and hold the buttons and until you hear a voice prompt saying, “Waiting for the network configuration.” Once the Wi-Fi indicator is blinking slowly, the Wi-Fi has been successfully reset.
Note: If your robot cannot connect to the app successfully, reset the Wi-Fi and add the device again.
How To Restarting Dreame D10?
If the robot stops responding or cannot be turned off, press and hold down the button![]() for 10 seconds to forcefully turn it off. Then press and hold the button
for 10 seconds to forcefully turn it off. Then press and hold the button ![]() for 3 seconds to turn the robot on.
for 3 seconds to turn the robot on.
How To Use Dreame D10 Robot Vacuum?
Turn On/Of
Press and hold the button ![]() for 3 seconds to turn on the robot. Once the power indicator turns solid white, the robot is on standby. To turn off the robot, press and hold the button
for 3 seconds to turn on the robot. Once the power indicator turns solid white, the robot is on standby. To turn off the robot, press and hold the button![]() for 3 seconds when the robot is not moving.
for 3 seconds when the robot is not moving.
Start Cleaning
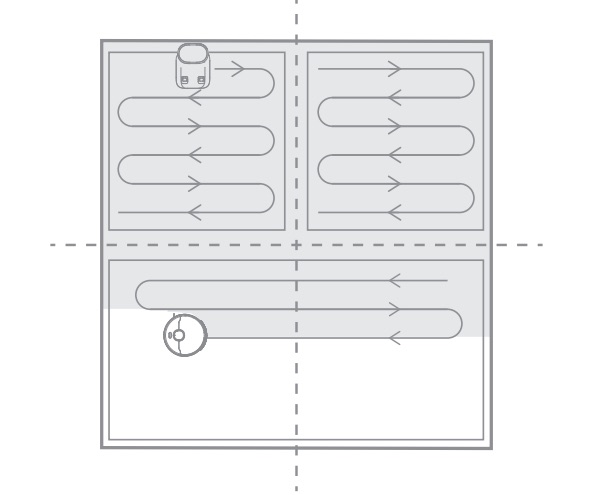
Press the button ![]() briefly to turn on the robot. Upon activation, the robot will accurately map out a route, methodically clean along the edges and walls, then finish by cleaning each room in an S-shaped pattern to ensure a thorough job.
briefly to turn on the robot. Upon activation, the robot will accurately map out a route, methodically clean along the edges and walls, then finish by cleaning each room in an S-shaped pattern to ensure a thorough job.
Cleaning Mode
Dreame Bot D10 Plus has four cleaning modes: Quiet, Standard, Strong, and Turbo. The default mode is Standard. You can specify the cleaning mode in the app.
Pause/Sleep Mode
Pause: Press any button briefly to pause the robot during cleaning.
Sleep Mode: If the robot pauses for more than 10 minutes, it automatically enters the sleep mode, and the power indicator and charging indicator will go off. To wake up the robot, press any button.
Note:
- The robot will turn off automatically if left in Sleep Mode for more than 12 hours.
- If the robot is paused and placed onto the base, the current cleaning task will end.
Spot Clean Mode
When the robot is paused or in Standby Mode, press and hold the button ![]() for 3 seconds to start Spot Clean Mode. In this mode, it will clean a square-shaped area of 1.5×1.5 meters directly around the robot. When the spot cleaning is done, the robot will automatically return to its original location and power off.
for 3 seconds to start Spot Clean Mode. In this mode, it will clean a square-shaped area of 1.5×1.5 meters directly around the robot. When the spot cleaning is done, the robot will automatically return to its original location and power off.
Note: Activating Spot Clean Mode will end the current cleaning task of the robot.
Additional App Functions
Follow the instructions on the app interface to use more functions. The version of the app might have been updated; please follow the instructions based on the current app version.
Use the Mopping Function
It is recommended that all floors are vacuumed at least three times before the first mopping session to achieve a better cleaning effect.
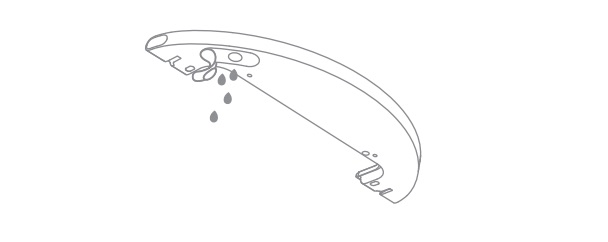
1) Dampen the mop pad and wring out excess water. Insert the mop pad into the slot of the water tank as shown in the figure, and paste the pad firmly.
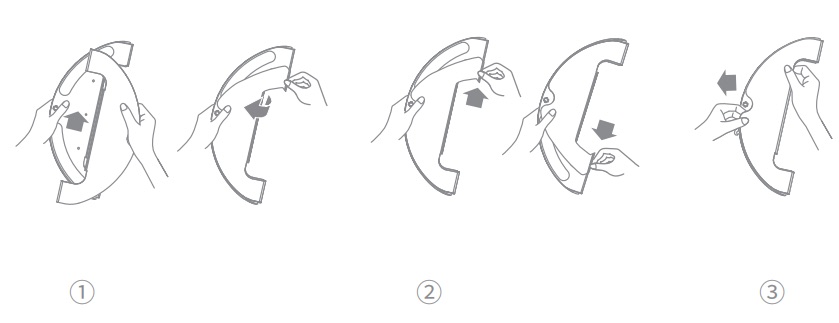
2) Open the water tank lid, fill the tank with water, then securely close the lid.
Note: Do not use detergent or disinfectant.
3) Align the mopping module as indicated by the arrow, then slide it into the back of the robot until it clicks into place. Press the button or use the app to start cleaning.
Note:
- It is not recommended to use the mopping function on carpets.
- Use the app to adjust the water flow as required.
4) Press the two side clips inwards and slide the water tank backwards to separate it from the robot.

Note: When the robot is charging or not in use, remove the mopping module, pour out all the remaining water in the tank, and clean the mop pad to prevent mildew or odors.
Dreame D10 How to Routine Maintenance?
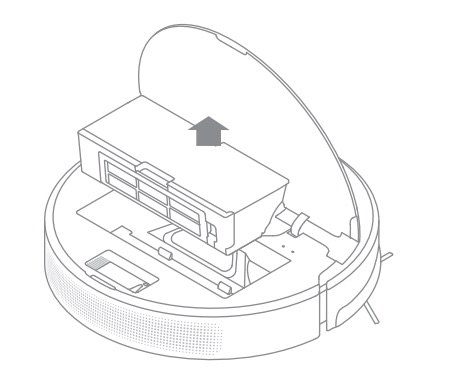
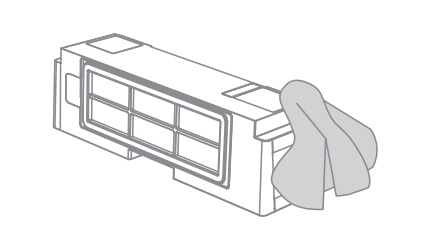
Clean the Dust Bin
Clean after each use
1. Open the robot cover, then press the dust bin clip to remove the dust bin.
2. Open the bin cover and empty the bin as shown in the diagram.
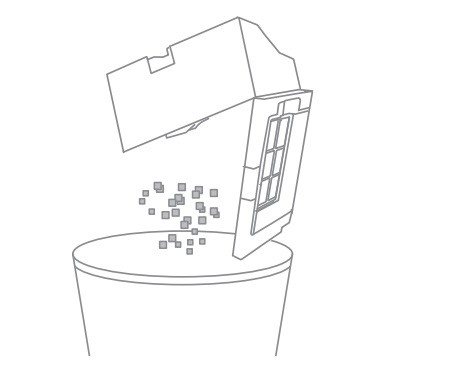
3. Clean the dust intake.
Clean the Filter
1. Remove the filter and tap its basket gently.
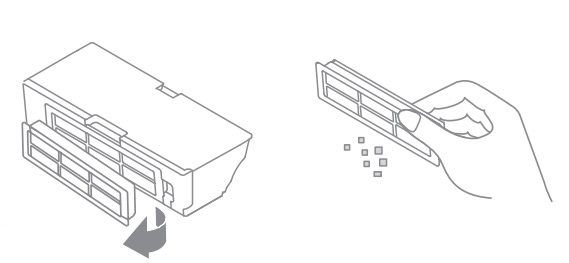
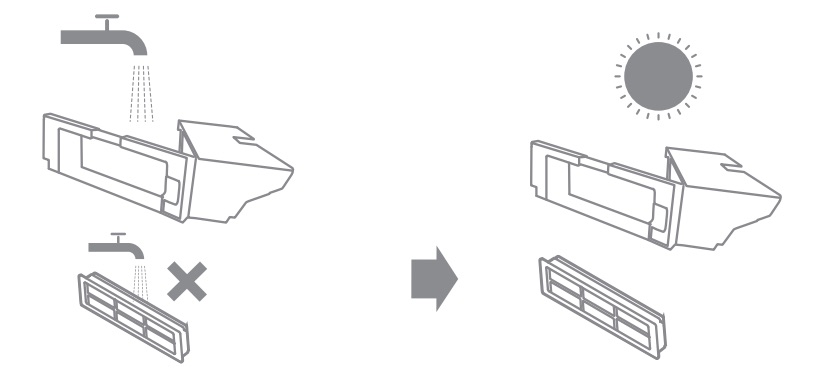
2. Do not wash the filter. Only the dust bin is washable. Thoroughly dry it before re-installing.
Note:
- Do not attempt to clean the filter with brushes or fingers.
- Rinse the dust bin with clean water only. Do not use any detergent.
- Only use the dust bin and filter when they are completely dry.
- The filter is recommended to be cleaned every two weeks and replaced every three months.
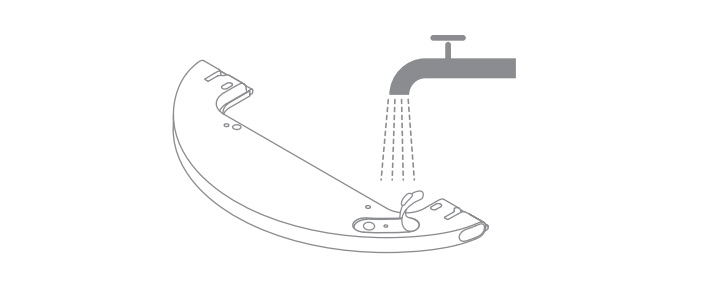
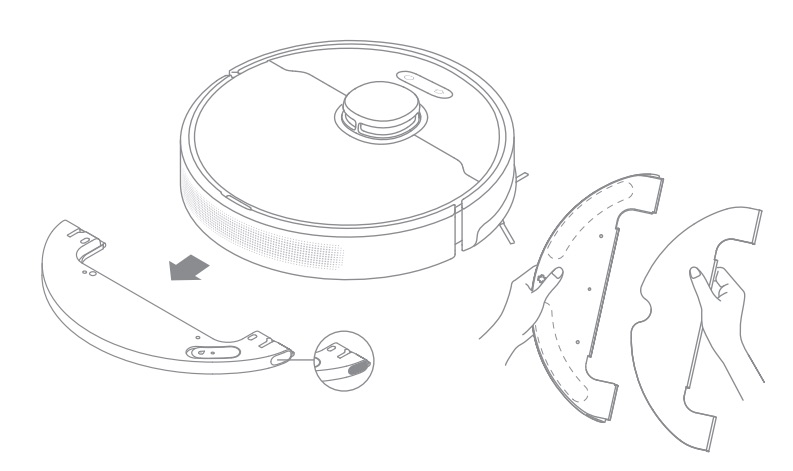
Clean the Mopping Module
1. Press the two release clips on the side of the water tank, remove the mopping module, and pull the mop pad off the mopping module.
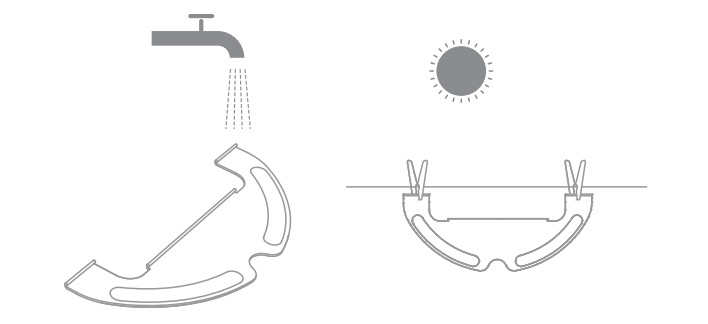
2. Pour out the water in the tank. Clean with only water and leave out to air dry before re-installing.
Note: Do not expose the tank to the sun directly
3. Clean the mop pad with water only and leave to air dry before re-installing.
Note:
- Remove the pad from the mopping module before cleaning it, and make sure dirty water does not flow back into the water outlet to avoid clogging.
- For optimal performance, it is recommended to replace the mop pad every 3-6 months.
4. If slow water flow occurs, or the volume is not well-distributed, clean the air hole in the cover of the water tank.
Clean the Main Brush
Press the brush guard clips inwards to remove the brush guard and lift the brush out of the robot.
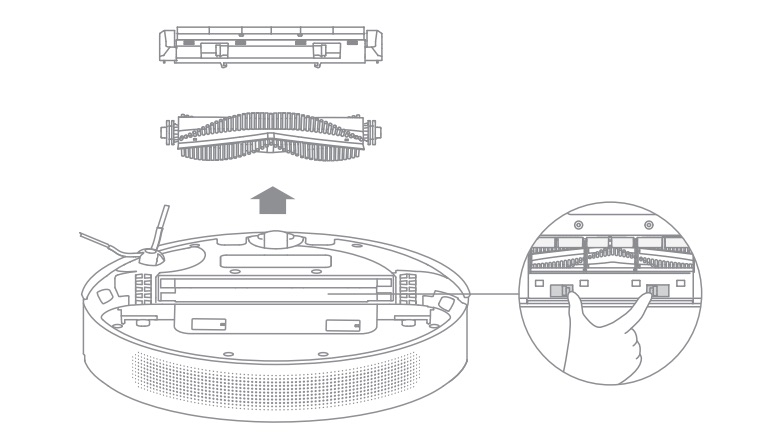
Pull out the brush covers as shown in the diagram. Use the included cleaning tool to remove any hairs tangled in the brush.
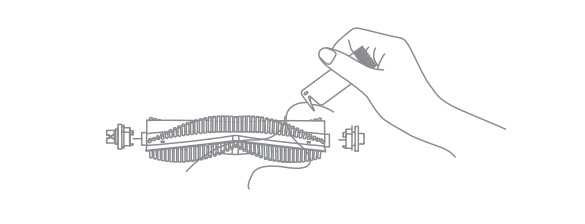
Note: Do not pull out the hair tangled in the main brush excessively. Otherwise, the brush may be damaged.
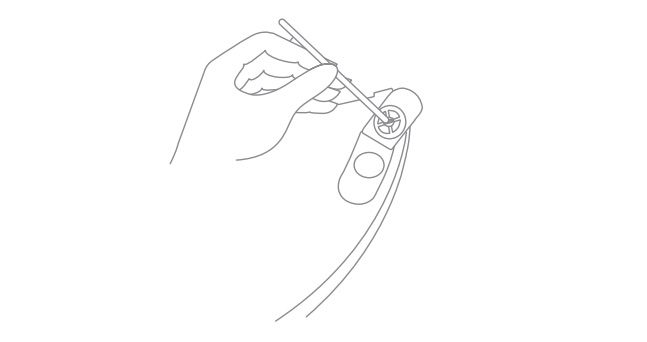
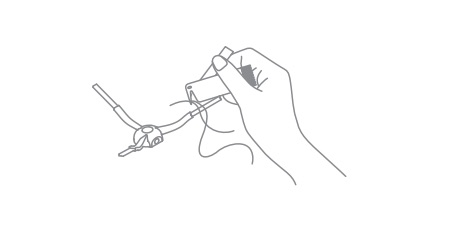
Clean the Side Brush
Pull out the side brushes and use the cleaning tool to remove any hair tangled on the brush.
Clean the Main Wheel/Universal Wheel
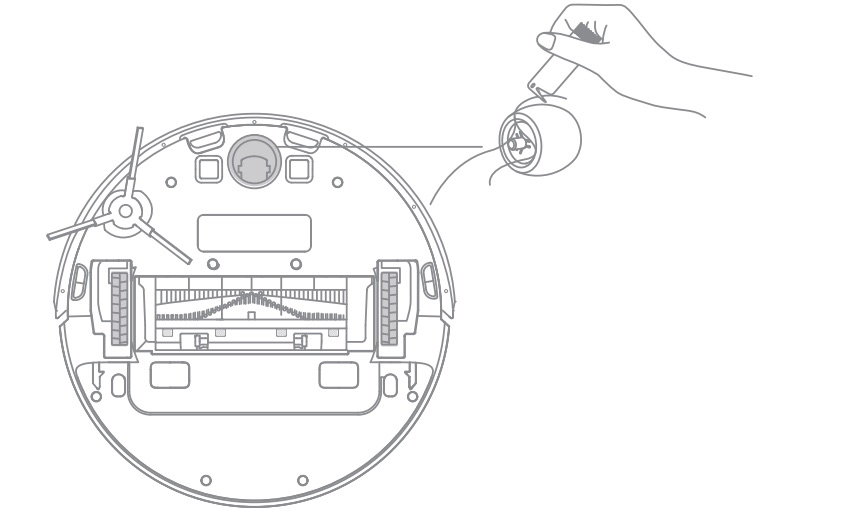
Note: Use a tool such as a small screwdriver to separate the axle and tire of the universal wheel.
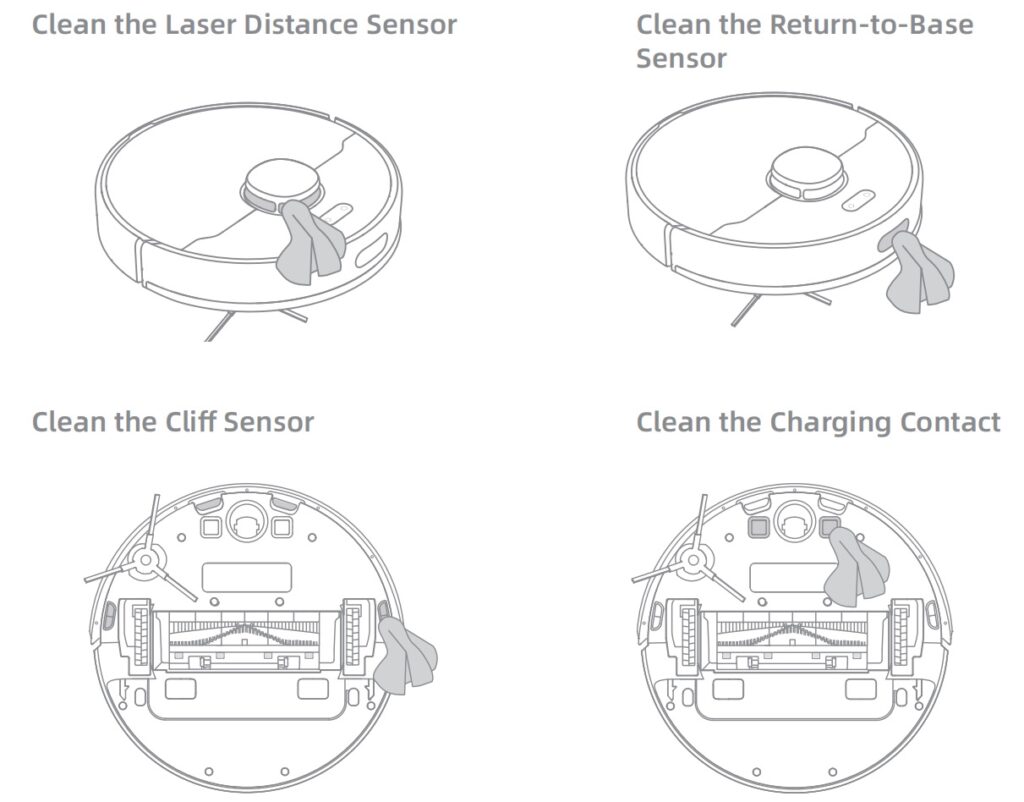
Clean the Sensor
Note: Wet cloths can damage sensitive elements within the robot and base. Please use dry rags for cleaning.
Replace the Dust Collection Bag
According to the status indicator (blinking orange) and app prompts, replace it with a new one when the dust collection bag is full. It is recommended to replace the bag every 4-6 weeks.
1. Discard the dust collection bag
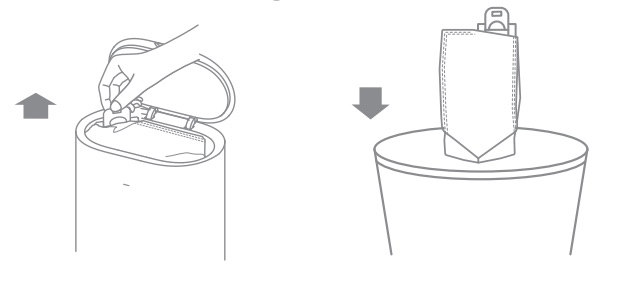
Note: When taking out the dust collection bag, close the dust bag handle to avoid dust leaking out.
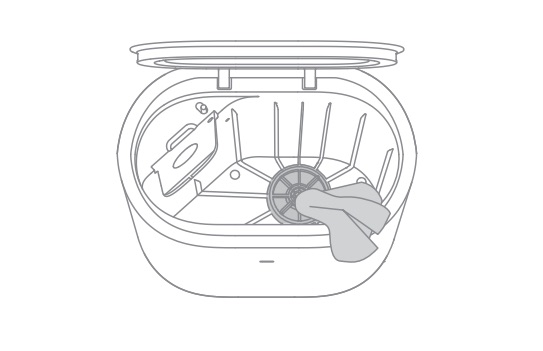
2. Wipe the filter with a dry cloth
3. Install a new dust collection bag
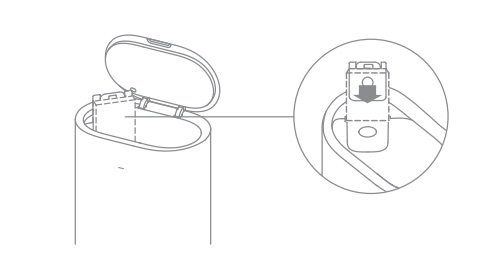
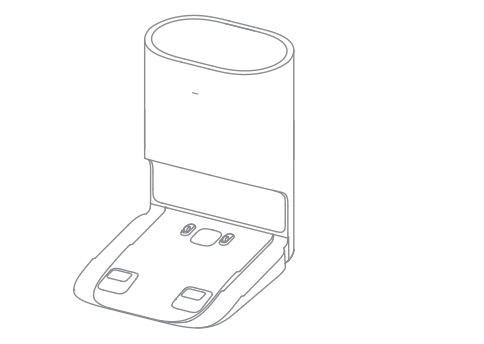
4. Close the upper cover of auto-empty base
Note: Do not close the base forcelly, if the upper cover of base cannot be closed and the dust collection bag is not installed.
Clean the Air Duct
If the air duct is blocked, please clean it according to the following steps.
1. Unscrew mounting screws on the air duct cover and remove the cover plate.
2. Check whether the air duct is blocked by foreign objects. If any, clean them.
3. Reinstall the air duct cover as shown in the diagram.