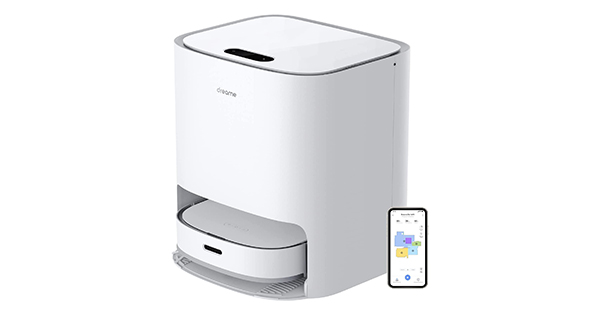
This manual applies to the Dreame W10 and W10 PRO Robot Vacuum.
W10 Robot Vacuum Preparations Before Use
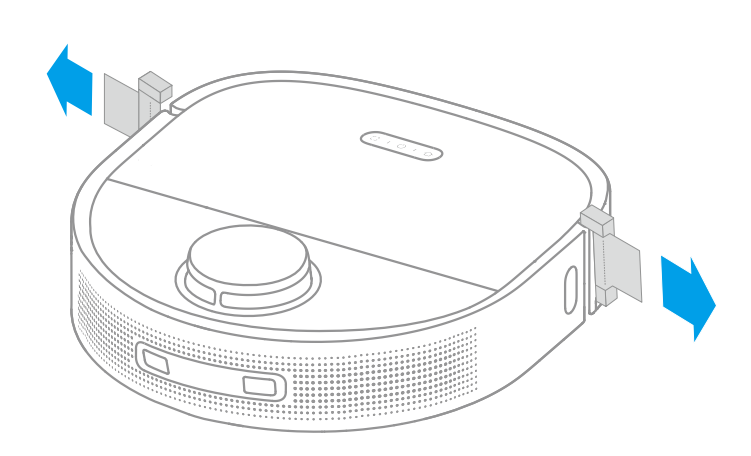
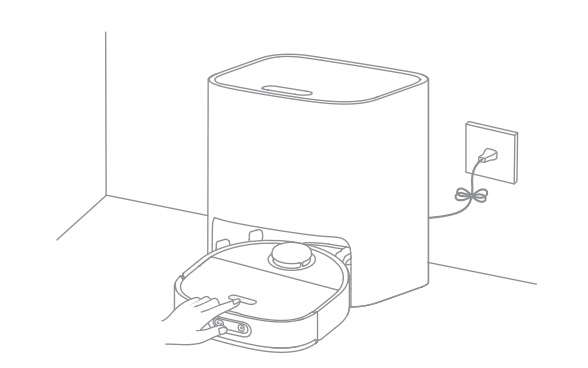
1. Remove the protective strips
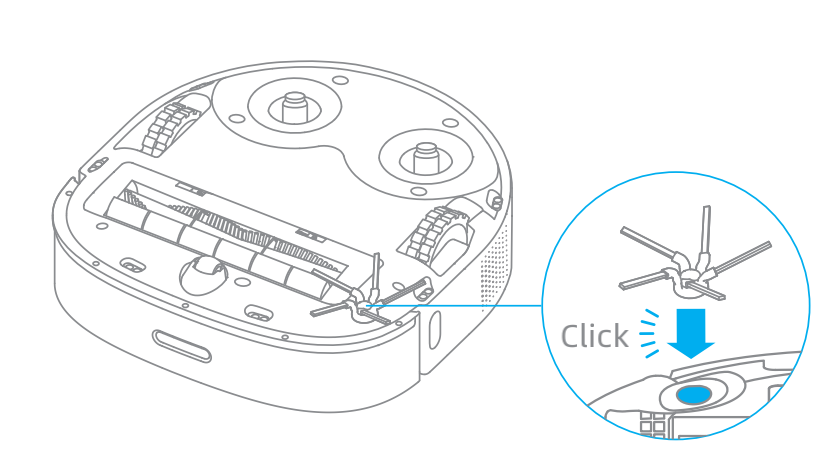
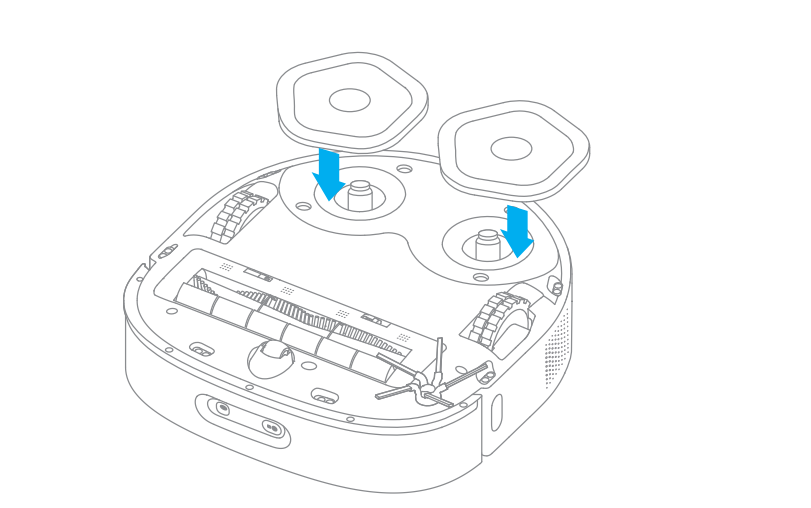
2. Install the side brush
Note: Install the side brush until it clicks into place.
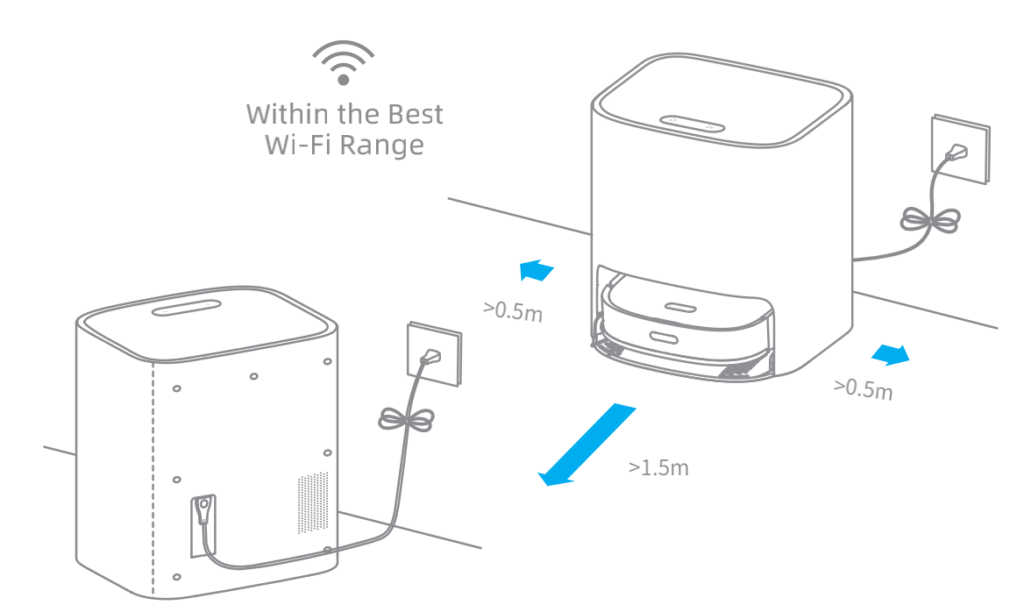
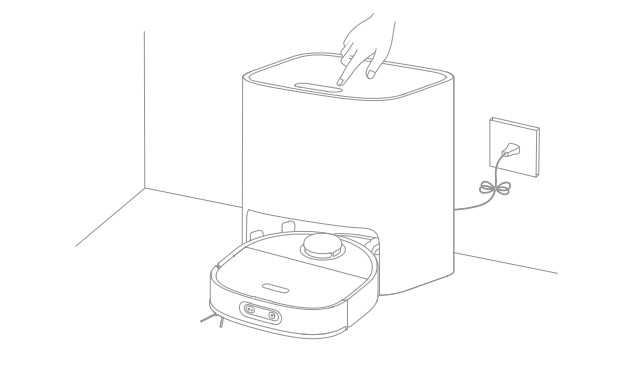
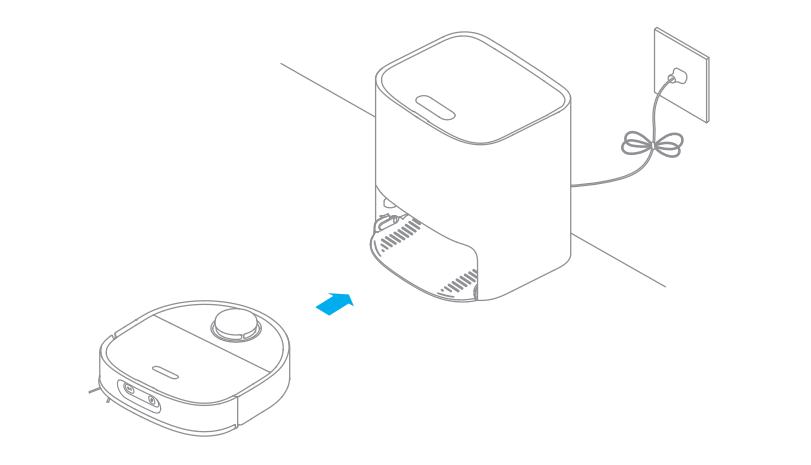
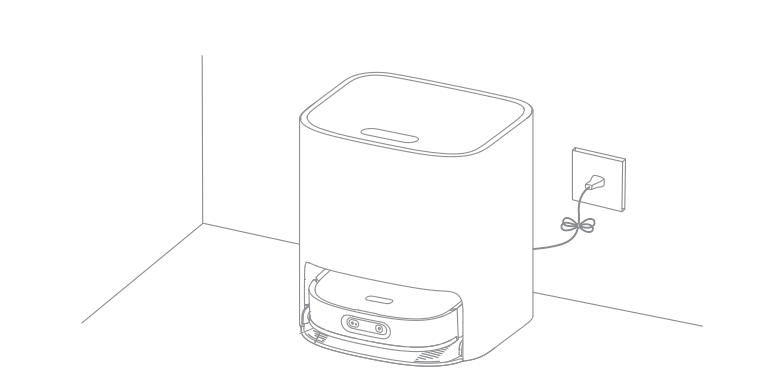
3. Place the base against the wall and charge the robot.
- Install the base in as open a location as possible with a good Wi-Fi signal.
- Insert the power cord into the base and plug it into the socket.
- Place the robot onto the base, and the robot will trun on automatically and start charging.
- It is recommended to fully charge the robot before the first use. After the robot is fully charged, the status indicator illuminates white for 10 minutes and then lights down.
Note:
- Remove any objects that are closer than 1.5 m from the front and 0.5 m from either side of the base.
- Make sure that no objects might block the signaling area.
- To prevent water stains from wetting wood floors or carpets, the self-wash base is recommended to be placed on tile floors or marble floors.
How to connect Dreame W10 to Phone?
The Dreame W10 Robot Vacuum works with the Mi Home app, which can be used to control the appliance and make it interact with other smart devices.
Or use Dreame official app, Dreamehome.
W10 Robot Vacuum connects to Mi Home APP
Open the Mi Home app, and tap ” ![]() ” in the upper-right corner to go to the Add Device page. Then, tap “
” in the upper-right corner to go to the Add Device page. Then, tap “![]() ” in the upper-right corner, scan the QR code on the robot to add “Dreame Bot W10”, and then connect the device as prompted.
” in the upper-right corner, scan the QR code on the robot to add “Dreame Bot W10”, and then connect the device as prompted.
W10 Robot Vacuum connects to Dreamehome APP
Open the Dreamehome APP and click on the “+” in the upper right corner to enter the “Add Device” page. Then select Dreame W10 and follow the instructions to connect to Robot Vacuum.
Note: If the robot cannot connect to your phone, Reset the Wi-Fi network and try again.
How To Reset W10 Robot Vacuum Wifi?
Simultaneously press and hold the ![]() and
and ![]() buttons until you hear a voice prompt saying, “Waiting for the network configuration.” Once the Wi-Fi indicator is blinking slowly, the Wi-Fi has been reset.
buttons until you hear a voice prompt saying, “Waiting for the network configuration.” Once the Wi-Fi indicator is blinking slowly, the Wi-Fi has been reset.
Wi-Fi Indicator
- Blinking slowly: To be connected
- Blinking quickly: Connecting
- On: Connected
How To Use Dreame W10 Robot Vacuum?
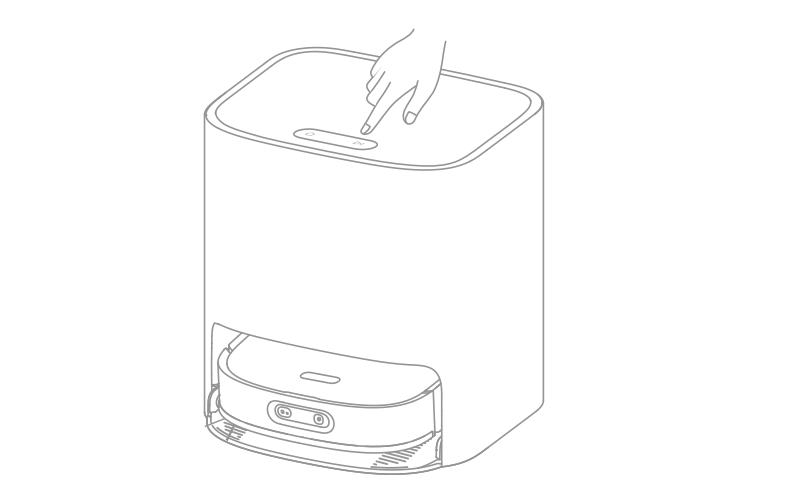
Turn On/Of
Press and hold the![]() button for 3 seconds to turn on the robot. The power indicator should be illuminated. Place the robot onto the base, the robot should turn on automatically and begin charging. To turn off the robot, move the robot away from the base and press and hold the
button for 3 seconds to turn on the robot. The power indicator should be illuminated. Place the robot onto the base, the robot should turn on automatically and begin charging. To turn off the robot, move the robot away from the base and press and hold the![]() button for 3 seconds.
button for 3 seconds.
Fast Mapping
Remove the mop pads before engaging fast mapping.
After you connect the robot to the app, create a map as instructed in the app.
The robot will move around to scan the environment and create a map. It will not clean at this time. After the robot returns to the base, a map is created and saved automatically.
Pause / Sleep
When the robot is cleaning, press briefly any buttons on the robot or the ![]() button on the base to pause the robot.
button on the base to pause the robot.
If the robot is paused for more than 10 minutes, it automatically enters sleep mode. The power indicator and charging indicator will turn off. Press any button on the robot or base, or use the app to wake up the robot.
Note:
- The robot will turn off automatically if it is left in the sleep mode for more than 12 hours.
- If the robot is paused and placed onto the base, the current cleaning process will end.
Spot Cleaning
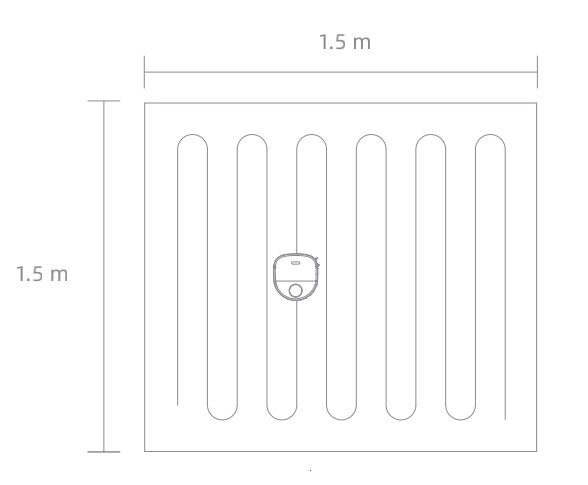
When the robot is not placed on the base and is on standby, press briefly the ![]() button to enable the spot cleaning mode. In this mode, the robot cleans a square-shaped area of 1.5 × 1.5 meters around it and returns to its starting point once the spot cleaning is completed.
button to enable the spot cleaning mode. In this mode, the robot cleans a square-shaped area of 1.5 × 1.5 meters around it and returns to its starting point once the spot cleaning is completed.
Sweeping Function
Note: Do not attach the mop pads while using the sweeping function.
Method 1: Press the ![]() button on the base sand the robot will start sweeping.
button on the base sand the robot will start sweeping.
Method 2: Press the![]() button on the robot and the robot will start sweeping.
button on the robot and the robot will start sweeping.
Note:
- Make sure that the robot is fully charged before using it. Do not manually move the robot when it is cleaning.
- If the battery gets low while cleaning, the robot will return to the base and resume cleaning after charging its battery. The “Resume Cleaning” function must be enabled on the app in advance.
Cleaning Mode
After the W10 robot is turned on, it cleans each room by cleaning along the edges and walls first and then cleaning in an S-shaped pattern. The robot automatically returns to the base to charge its battery after cleaning.
Switching the W10 Robot to Mopping Mode
Note: Do not use the mopping function on the carpet.
1. Attach the mop pads
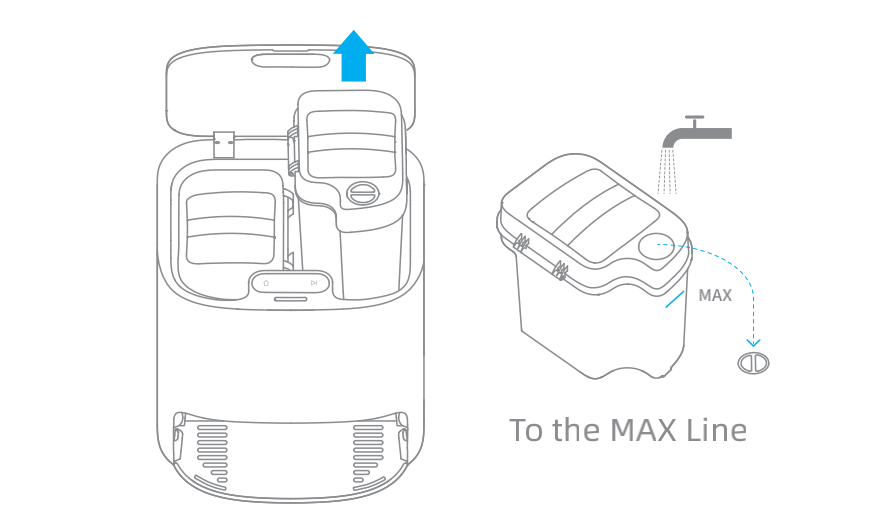
2. Take out the fresh tank, fill it with clean water, and then place the fresh tank into the base.
Note: Do not fill with hot water, otherwise the fresh tank may be deformed.
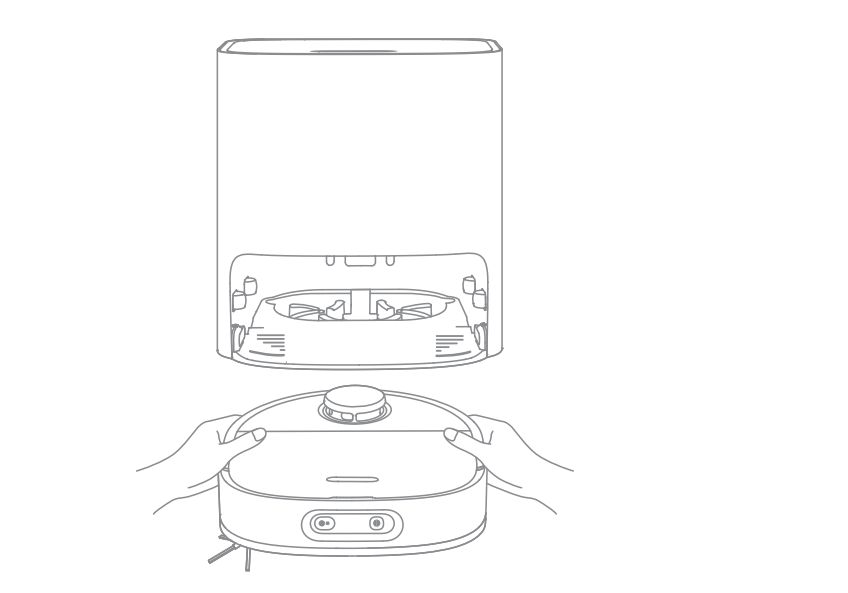
3. Place the robot onto the base
4. Start mopping
Press the ![]() button. The robot will start from the base and mop the house based on the optimal cleaning plan arranged in the map.
button. The robot will start from the base and mop the house based on the optimal cleaning plan arranged in the map.
Note:
- If the robot is not on the base, please put it back before starting it.
- The robot will clean the mop pads before it starts cleaning. Please wait patiently until the mop pads are cleaned.
- Do not manually move the base, fresh tank, waste tank, or washboard while mopping.
5. Return to self-clean
While mopping, the robot will return to the base to have the mop pads cleaned according to cleaning conditions set in the app. The robot will resume cleaning after the mop pads are cleaned.
6. Clean the mop pads
After the robot completes cleaning and returns to charge, the base will start cleaning and drying the mop pads.
Note:
- To engage mop cleaning at any time, press and hold the
 button on the base for 3 seconds.
 - While cleaning the mop pads, if the water in the fresh tank is insufficient or the waste tank is full, the robot will send a voice prompt, or the app will send a notification.
- After the robot finishes mopping, promptly clean the waste tank to prevent mold or odor. Changing the mop pads every 1 to 3 months is recommended.
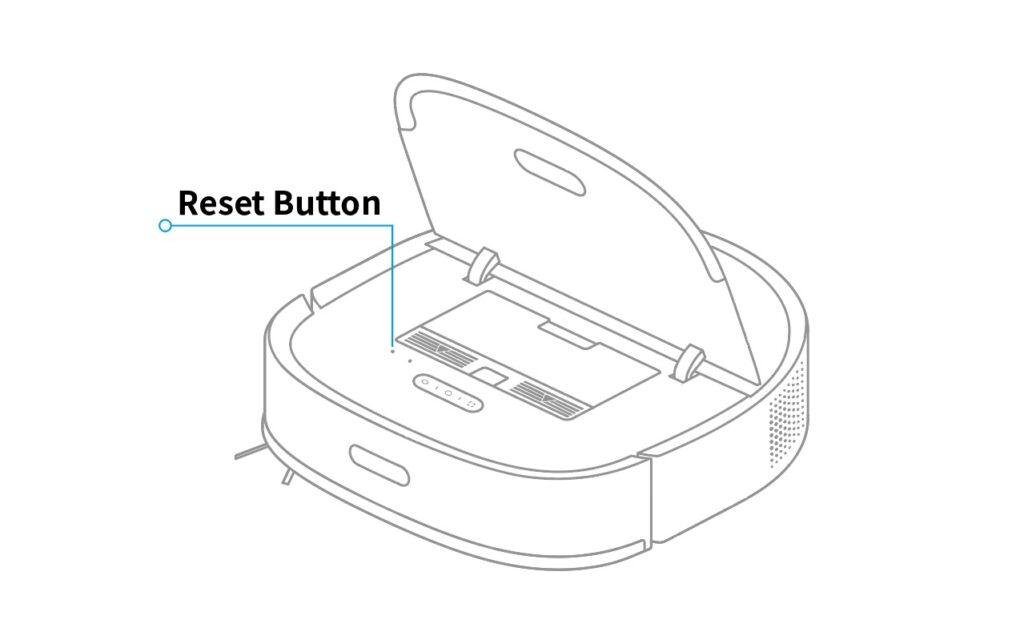
How To Restore Dreame W10 Factory Settings?
If the Dreame W10 robot does not function properly and the buttons elicit no response after being restarted, use a pin to press the reset button for 3 seconds until you hear a voice saying “Restoring factory settings”. It will take about 5 minutes to reset the robot to its original factory settings. After resetting the robot, you will have to recreate maps and no-go zones.
Dreame W10 How to Routine Maintenance?
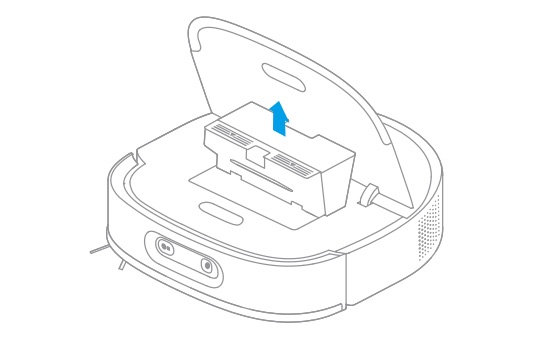
Dust Bin
(Clean it as needed)
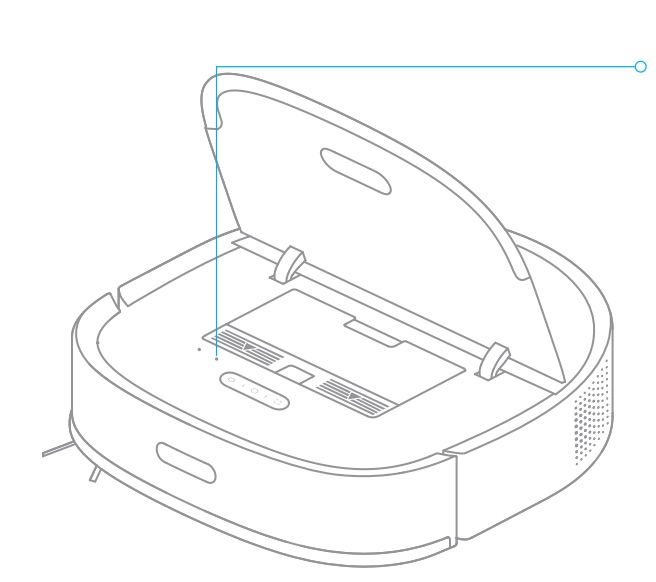
1. Open the robot cover and press the dust bin clip to remove the dust bin.
2. Open the bin cover and empty the bin as shown in the diagram.
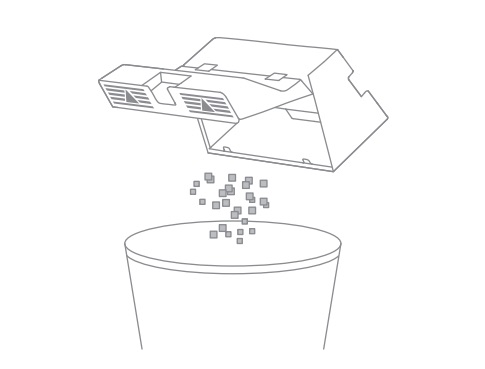
The cleaning tool can be used to empty the dust bin.
Filter
(Clean it once every 2 weeks (fully dry after cleaning) and change it every 3 months)
1. Remove the filter and gently tap the filter frame to shake out the dirt.
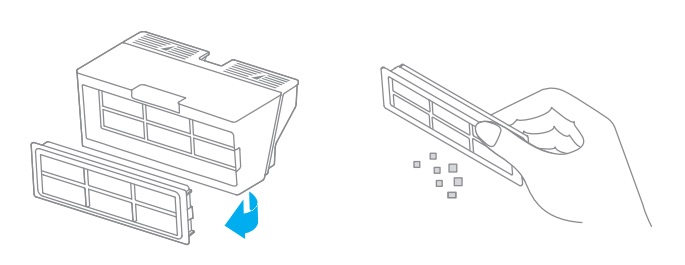
Note: Do not attempt to clean the filter with a brush, finger, or sharp object.
2. If necessary, rinse the dust bin and the filter under the running water and dry them completely before re-installing.
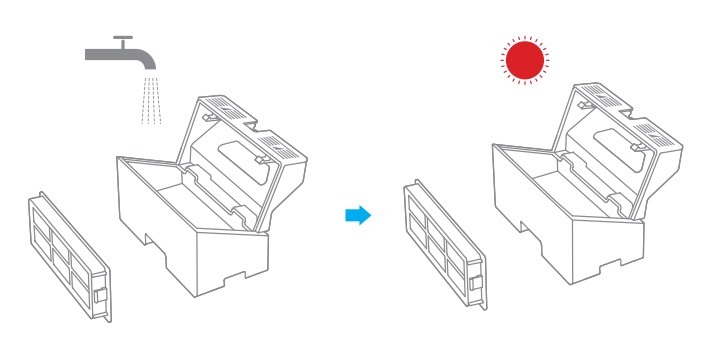
Note:
- Only rinse the dust bin and the filter with clean water. Do not use any soap or detergent.
- Use the dust bin and filter only when whey are completely dry.
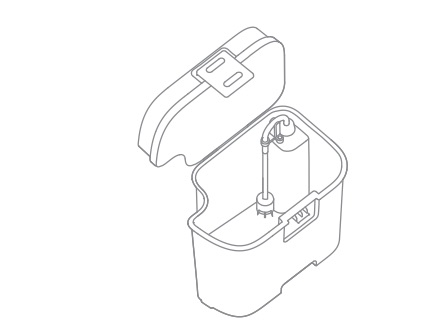
Fresh Tank
(Clean the filter media once every 2 weeks)
1. Open the fresh tank cover, move the hose to the side to remove and clean the filter media as shown in the diagram.
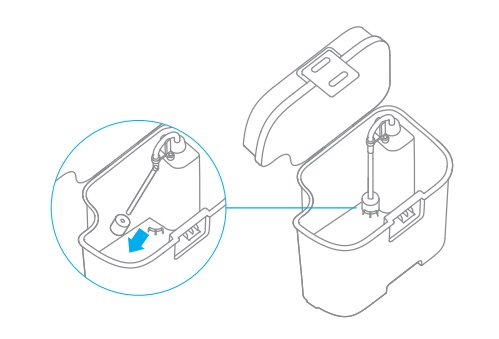
2. Put the filter media and hose back in their original position.
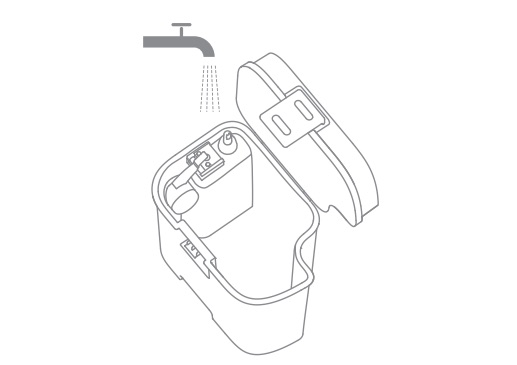
Waste Tank
(Clean after each use)
1. Take out the waste tank, open the waste tank cover, and then dump the wastewater.
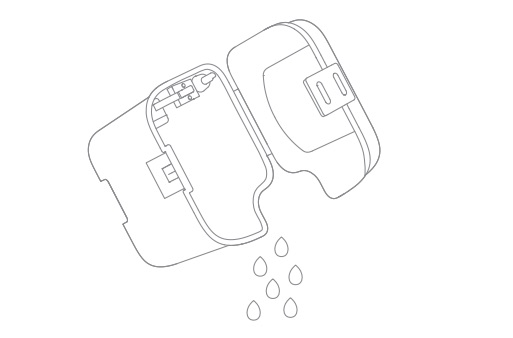
2. Clean the waste tank with water and put it in the base.
Note: The floating ball in the waste tank is a moving part. Do not clean the floating ball excessively in case of affecting its functions.
Washboard
(Clean once every 2 weeks)
1. Press the clips on both sides of the bottom of the base to remove the washboard.
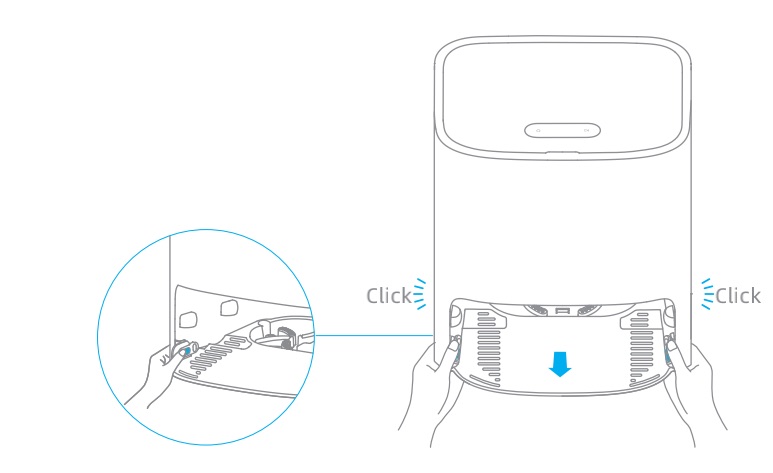
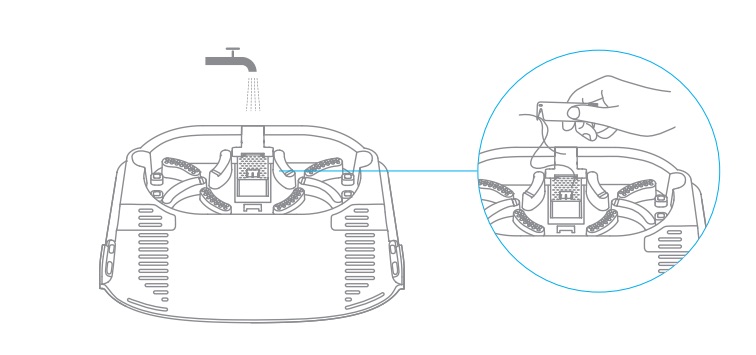
2. Use the provided cleaning tool to clean the washboard completely.
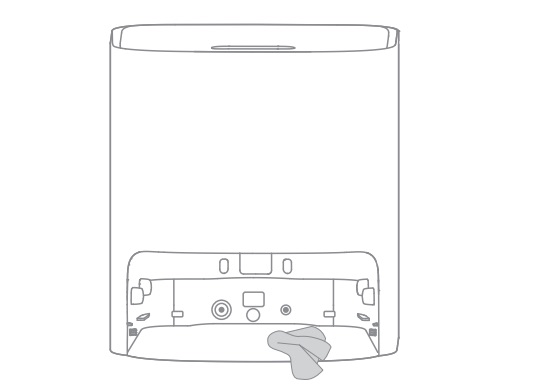
3. Wipe the bottom of the base with a dry cloth.
4. Insert the washboard into the base as shown in the diagram, making sure that both clips are in place.
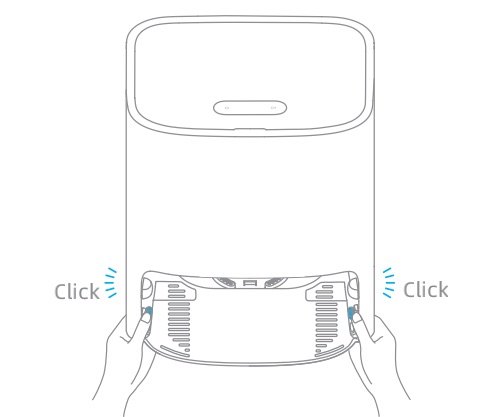
Note: Make sure that the washboard brackets are in place.
Cleaning the Main Brush
Press the brush guard clips inwards to remove the brush guard and lift the brush out of the robot.
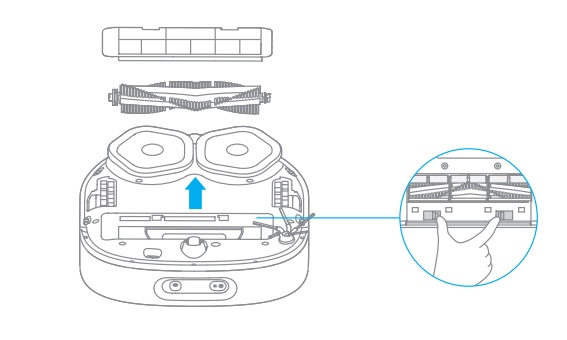
Pull out the brush covers as shown in the diagram. Use the provided cleaning tool to remove any hair tangled in the brush.
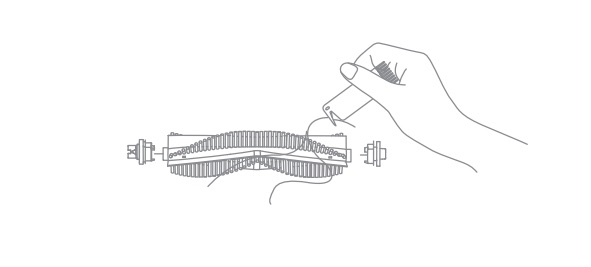
Note: If any hair is thoroughly tangled in the brush, do not pull it too hard. Doing so may damage the main brush.
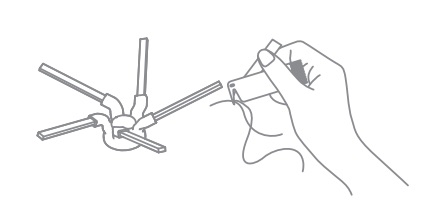
Cleaning the Side Brush
Remove and clean the side brush.
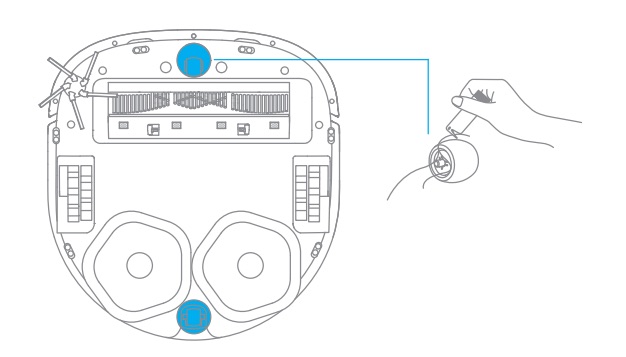
Cleaning the Universal Wheel/Auxiliary Wheel
Use a tool such as a small screwdriver to separate the axle and tire of the universal wheel. Do not use excessive force.
Rinse the universal wheel under the running water and put it back after drying it completely.
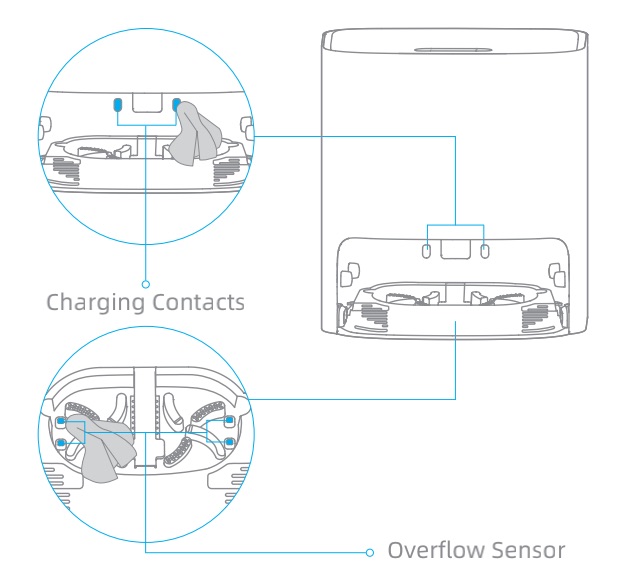
Robot Sensors and Charging Contacts
Wipe the robot’s sensors and charging contacts by using a soft, dry cloth:
- Cliff sensors at the bottom of the robot
- Charging contacts at the back of the robot
- Return-to-base sensor at the front of the robot
- Bumper at the front of the robot
- LDS on the top of the robot
- 3D ToF sensor and AI Visual sensor at the front of the robot
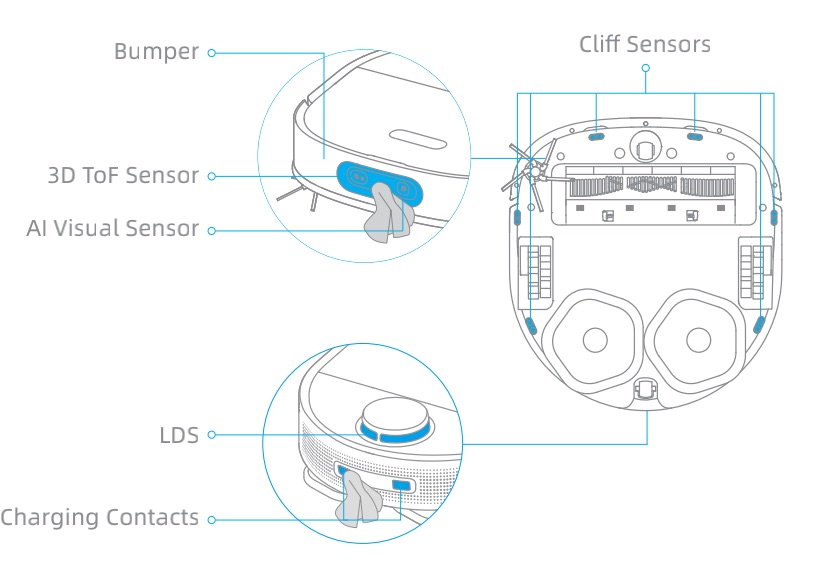
Note: Wet cloth can damage sensitive elements within the robot and base. Please use a dry cloth for cleaning.
Self-Wash Base Charging Contacts and Overflow Sensor